
The key points
- Strip lighting is a joinery decision as much as an electrical one. Plan it before the cabinets, shelves or bulkheads are made.
- The driver is the part most likely to fail, so it must sit somewhere ventilated and reachable, never sealed behind a kickboard or plaster.
- Aluminium channel with a diffuser gives a smooth line and draws heat away from the LEDs, which helps them last.
- Aim the strip so you see the light, not the dots: toward the front of a cupboard, inside a shadow line or behind a lip.
- Give strip its own switch in most rooms, and plan the dimming with the rest of the lighting.
Where strip lighting earns its place
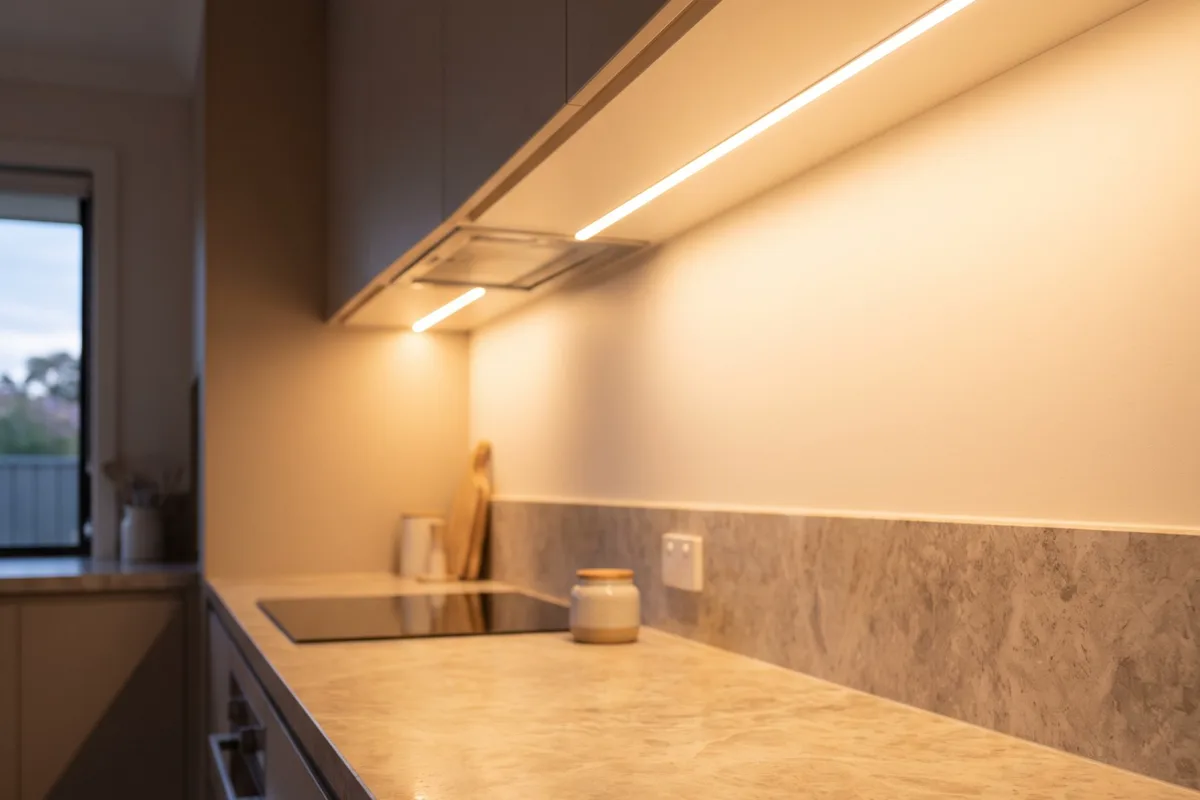
Strip works best as a line of light with a job to do. Under overhead kitchen cupboards it lights the bench where downlights throw your shadow. In kickboards it gives a soft night light for the kitchen or bathroom. Inside shelves and display cabinets it lifts what's on them. In a ceiling bulkhead or shadow line, it bounces light off the ceiling for a gentle glow across the room.
On stairs, a strip under each tread or a low line along the wall marks each step without glare, and suits a sensor so it comes on as you approach. Behind a bedhead or TV, it softens the contrast between a bright screen and a dark wall.
Where it works less well is as the only light in a room. Strip is ambient or task light. Pair it with downlights, pendants or wall lights rather than expecting it to light the whole space.
Why it has to be planned before the joinery
Most strip lighting lives inside something: a cabinet, a shelf, a bulkhead or a stair. Once that's built, there's no easy way to add a recess for the channel, a cable path or a spot for the driver. Retrofitting usually means surface channel and visible cable, which rarely looks as good.
So the strip has to be on the cabinetmaker's drawings. Mark each run, the channel profile and whether it's recessed, the cable path back to power, and where the driver sits. Get the joiner and electrician talking if you can. A groove routed into the underside of a cupboard in the workshop is a quick job; cut in place, it's a messy one.
In a renovation, this happens alongside the rest of the kitchen or bathroom wiring. Running the cables at rough-in, while walls are open, keeps everything hidden.
Drivers: the part you have to be able to reach
LED strip runs at extra-low voltage from a driver that converts mains power. The driver is the component most likely to fail over the years, so where it goes matters more than which strip you buy.
Don't seal drivers behind fixed kickboards, inside plaster or under insulation. A ventilated cupboard, the roof space near the manhole or an access panel in the joinery all work. The driver should be sized for the strip it feeds with some headroom, and long runs may need power fed in at more than one point so the far end isn't dimmer than the start.
Connecting a driver to mains wiring, or adding a switch or power point for it, is licensed electrical work. Plug-in kits exist, but if the lead disappears into a cavity, it needs a properly placed outlet, not an extension lead hidden behind the cupboard.
Aluminium channel, diffusers and heat
Bare strip stuck to timber looks spotty and runs hot. An aluminium channel gives it a straight, rigid mount and draws heat away from the LEDs, which helps them last. A diffuser over the channel softens the dots into a continuous line.
Channels come in many profiles: shallow ones for under cupboards, deeper ones that hide the dots better, angled ones that aim light at the wall or bench, and recessed ones that sit flush in plaster or joinery. Dotless strip, with the LEDs under a continuous coating, gives a smooth line even in shallow channels.
Match the strip's colour to your downlights so the room doesn't mix two whites, and in kitchens choose a strip with high colour rendering (CRI) so food and timber look natural.
Placement: see the light, not the strip
The best strip lighting is the kind you never see directly. Under cupboards, mount the strip toward the front edge so it lights the bench rather than just the splashback. Behind a lip, bulkhead or shadow line, keep it high enough that someone sitting down can't see the strip itself.
Glossy benchtops and splashbacks reflect strip like a mirror. A deeper channel, a diffuser and an angled profile all cut those reflections. If you can, test a short length in place before the final fix.
In bathrooms and outdoors, use strip sealed for the location and keep the driver away from water. How close strip can go to a bath or shower depends on the position, so check before you buy.
Switching and dimming
Strip on its own switch is usually more useful than strip sharing a switch with the downlights. Kickboard or bulkhead lighting is often the light left on late at night, or the one that comes on by itself from a sensor.
Strip dims either on the mains side, with a dimmable driver and a matched wall dimmer, or on the low-voltage side, with a controller between the driver and the strip. Both work when the parts suit each other. Mixing them, or using a dimmer not made for the driver, is the usual cause of flicker.
For scenes, timers or app control, plan the controller's spot at the same time as the driver's, so both stay reachable.
What to bring to the planning stage
Bring the joinery drawings, a note of where you want each run, and any strip or channel you've already chosen. We'll mark the driver spots, cable paths and switch positions so the joiner and the electrician work to one plan. The wiring comes with a Certificate of Electrical Safety, as all electrical installation work does.
If the cabinets are already built, strip is still possible, with more compromises. Surface channel, a driver in the next cupboard and a tidy cable route can still give a good result.
Common questions
Quick answers
- Why does my light switch buzz or feel warm?A dimmer can hum faintly and feel a little warm, because it is an electronic device that sheds some heat while it works.
- Why do my lights turn on or off by themselves?Lights that switch on or off by themselves are usually following instructions you've forgotten: a smart switch schedule, a routine in an app, a motion or daylight…
- Why does my two-way light switch only work from one end?A light switched from two places relies on two switches joined by a pair of wires, so either switch can redirect the power.
- Why do my LED lights buzz or hum?Most buzzing LEDs come from a mismatch rather than a fault: a dimmer built for old halogen globes, an LED driver that doesn't suit the dimmer, an old transformer left in…
Sources for this guide
2 sources, with the date each was checked
- 1.Energy Safe Victoria: Electrical work isn’t a DIY job, even for small jobs such as changing power points or light switches. Accessed 30 September 2026.
- 2.Energy Safe Victoria: Whenever a licensed electrician completes any electrical installation work, they must provide a Certificate of Electrical Safety (COES). Accessed 30 September 2026.
Planning advice for homeowners. Installation requirements depend on the property and equipment. Where this guide refers to Victorian safety or rental rules, use the linked official guidance for the current requirements.